Wednesday, May 25, 2011

Sakura Charms with Leaves

I played some more with Sakura Charms by Cindy Holsclaw.  I traded the lentil beads for green glass leaves.  Here's was my first attempt.

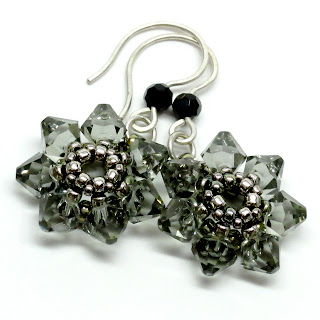
It's almost identical to Cindy's design, but I used larger beads everywhere and used 4 repeats instead of 5.  The photo doesn't show how purple the center beads are, and when you hang it, the flower tilts forward from all of the extra weight.  So it wouldn't hang properly as an earring anymore.  Even still, it's cute and fits well, and could be used in other ways, like a row of them for a bracelet.  Imagine them woven together like this Almond Drop bracelet. 

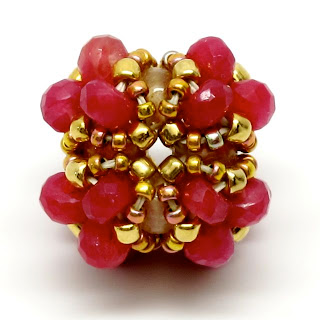
I don't love making bracelets, so I went back to the flower design and decided to rotate the flower to make it into a beaded bead, because well, I'm obsessed with beaded beads.  For me, every beading technique must be turned into a beaded bead eventually.   In this case, I added more beads to the back to make a calyx for my flower.  Here are two variations.  The leaves don't always sit symmetrically, especially if the back is too tight.  It's too tight on the left. 
 Here you can see my three flowers in a row.  The left one has Cindy's design on the back and you can see it lays flat.
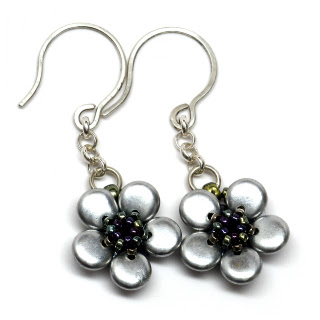
I wired my third flower into a bobble with a jump ring to hang it.

This bobble is for sale in my Etsy shop.

Monday, May 23, 2011

How to Crochet an Irish Lace Trim of Scallops

I made another Doceri video on crochet.  This one shows how to make a basic scallop trim; it's my own version of Irish lace crochet.  Here's a simple bracelet that I really like because it's light and stretchy, so I don't really notice I'm wearing it.
Here is the Doceri animation. What I like about this video is that the animated crochet chart is linked to the text through color coding.  In other words, the part of the chart being explained by a particular line of text and the text itself are both the same color. 
What I like in particular about making this trim is that you work the short way, making one scallop at a time.  I have two books full of trims that you crochet the long way, which forces you to know how long of a piece you want to make before you start, and if you never complete the last row, the whole piece is unfinished. I much prefer crocheting the short way, and being able to stop whenever I decide, get bored, or run out of thread.

Saturday, May 21, 2011

Beaded DNA Earrings

I love these tiny double helices.  If you haven't tried weaving your own beaded DNA earrings yet, you really should watch my bead weaving video on how to do it.  Or maybe you'd rather just buy a pair ready made?  Or maybe you just want to look at some photos.

Long ones....

And short ones. 
This color sequence on the shorter pair is a new one for me.
CCTGCAGG
GGACGTCC
I like that it reads the same forwards as backwards, making it a palindrome.  It's a nice color symmetry for a double helix.

Click the photos to see the Etsy listings for more information and photos.  Thanks for stopping by.

Friday, May 20, 2011

Mini Cuboctahedron Beaded Bead

Continuing my theme of mini beaded beads, today I present the mini Cuboctahedron Bead. With its 61 beads, the smallest diameter is 8.4 mm, and the longest is 10.8 mm.  It's about the same size as the mini fringe method bead I showed a few days ago, but with a very different symmetry.
Here you can see how the size compares between a few different minis.  Clockwise from top left are the Mini Ionic Cube, Mini El Cubo, Mini Cubocatahedron Bead, and Mini Fringe Method bead.


Thursday, May 19, 2011

Itty Bitty El Cubo Beaded Bead

Regarding mini beaded beads, here's the mini El Cubo, made with natural red rubies, yellow citrine quartz and lots of real gold plaited seed beads.   This beaded bead is for sale in my Etsy shop.
Here you can see it with the fringe method bead I showed in my previous post for comparison.  Yes, the bead with rubies looks huge, but photos can be deceiving.   The beaded bead on the left is 9mm with 71 beads.  In contrast the mini El Cubo is just 16mm (5/8 inches) on an edge, but it has more than twice as many beads in it, 180 to be exact, and it's still pretty small for a beaded bead.
 Remember, a gem in the hand is worth two in a photo.


Tuesday, May 17, 2011

Itty Bitty Fringe Bead

This beaded bead is made with the fringe method, with ten strands of fringe and seven beads in each strand.  That makes 70 beads, plus one for the core for a total of 71. That's a lot of beads considering it's only 9mm across.  If you want to make one, use a 6mm bead for the core.  Each strand of fringe has 6 size 15/0 seed beads and one 2mm Swarovski crystal, placed randomly between the second and second to last bead on the strand.  You can substitute a size 11/0 seed bead for the 2mm crystal, but I think the tiny crystals are what give it its personality.

Monday, May 9, 2011

Breathing new life into an older piece

I had a necklace that has been sitting in my Etsy shop for a couple years now, and while it had a respectable number of hearts, it hadn't sold, even after being marked down by 50 percent.  So, I finally decided to cut it apart and rework the piece to give it a new life.  Here's the new, longer necklace, complete with Lotus Bead in the center.

Here are the Telstar beaded beads.  You can click on the photos to take you to the Etsy listings for more information and photos.
Finally, here's a photo of the old necklace that I cut apart, for your comparison. 

Friday, May 6, 2011

Fairy Chrysalis Bead Encrusted Pendants for the rock collector in you

Because sometimes you just have to let loose and go free form...
Each of these pendants starts with natural stone core beads that I encrust with tons of other beads.  A variety of natural gemstone beads and seed beads cover the surface, and a bail to hold a chain is woven right into the beadwork.

Blue Opal and Aquamarine core beads
Pink Muscavite core bead
Blue Sodalite core bead
Labradorite core bead
Although my technique is free form, I think you can see from the photos that it is not entirely without method.  Click on the photos to learn more about the individual pieces above.  If you would like to learn about the techniques I used, check out the pattern I wrote explaining a general method for weaving these free form Fairy Chrysalis pendants.

Wednesday, May 4, 2011

Sakura Charms with Bicone Pendants

I started playing with Cindy Holsclaw's design Sakura Charms.  Left with no more lentils, I dove back into my bead box to find something lenil-ish, and I found 6mm Swarovski pendant bicone beads, which are bicones that are top drilled instead of the usual center drilled. With some effort, I found that 7 repeats fits nicely.
To makes these charms, follow Cindy's pattern with the following changes:
* Use 6mm bicone pendants instead of lentils.
* Use size 8/0 seed beads for the P beads.
* Use 11/0 for A and D beads.
* Make 7 repeats instead of 5.

These Blingy Burst Earrings are for sale in my Etsy shop.

Here you can see what my experiments looked like before I settled on the counts above.  I tried 5 repeats first, and it didn't fit so well.  Then, 6 repeats was better, but I prefer it with 7. 


Monday, May 2, 2011

Sakura Charms - Cindy's Newest Pattern

We just released a new pattern called Sakura Charms by Cindy Holsclaw.  Cindy originally designed this gorgeous necklace for a contest sponsored by the  Bead Mavens, and when Florence Turnour and I saw it, it was love at first site for both of us.  We did not hesitate to request that she pattern this beauty as quickly as possible in hopes that we could present it through beAd Infinitum.  Cindy cheerfully accepted.
When Cindy sent me the pattern to review, I was immediately struck by how beautiful the pattern is.  There is something so magical and whimsical about the shape of cherry blossoms with their five circular petals, and a whole pattern full of drawings and photos in every color is, well, magical!  I dug through my bead box and was only able to find the right-sized lentils in one color, silver.  So I used the silver, with more silver seed beads, and whipped up a pair of silver Sakura Charm earrings.   I was surprised and delighted by how small the flowers are and how quickly they finish.

My only contribution design-wise is the few links of chain holding the charms to the ear wires.  It's a nice way to make them a little longer without really changing the look or adding much weight.  This pair of Sakura Charm earrings is for sale in my Etsy shop.
Related Posts Plugin for WordPress, Blogger...