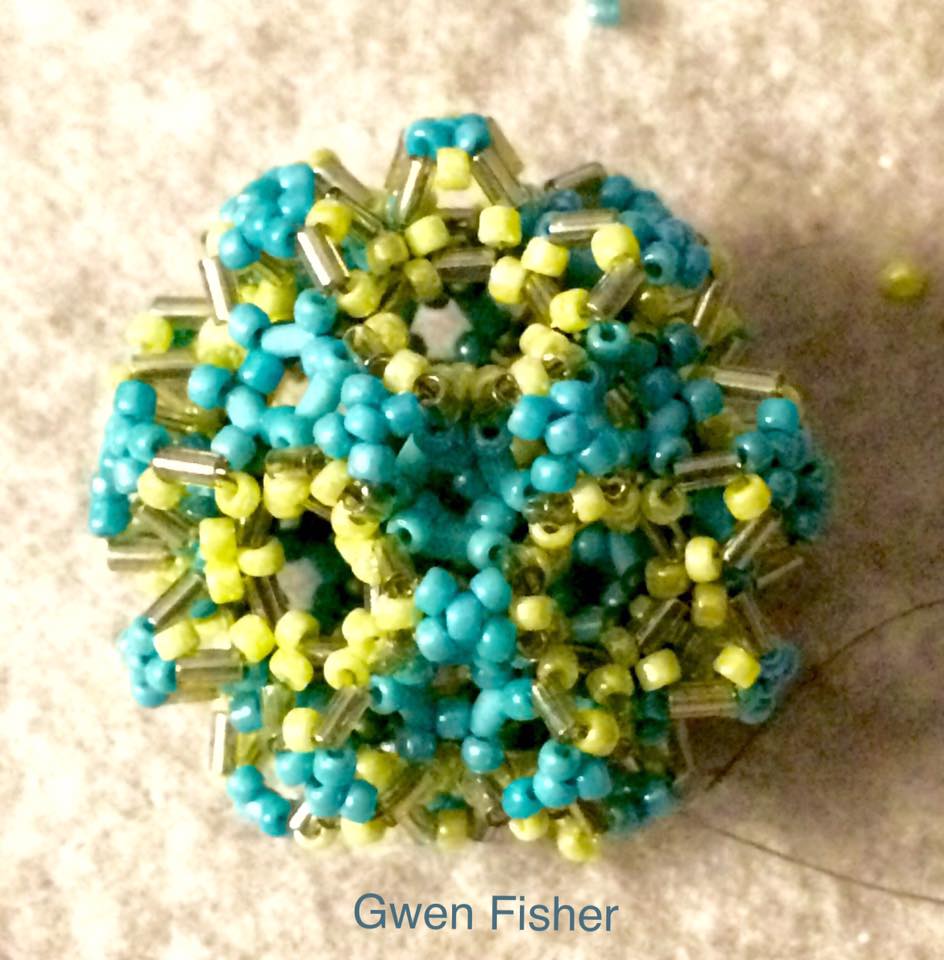
Meet Crater Moon.
and
Crater Moon in White...
Each Crater Moon is composed of nearly 2700 beads.
The
American Mathematical Society recently posted a photo of an amazing structure on their Facebook page with no comment of who made it. They called it a
rhombicosidodecahedron (3.4.5.4) because that is the name of the polyhedron in the very inside layer, but
Susan Goldstine noticed that the outside layer is actually a
truncated icosadodecahedron (4.6.10). This object is a multilayered compound of unusual polyhedra.
With help from
Susan, I figured out how to weave it with seed beads and thread. Susan built this model below using Zometool, and wrote, "
This
is what the structure above each triangular face of the
rhombicosadodecahedron looks like. I feel better about not being able
to make out what's going on from the original photo. The cavity has a
triangle, six trapezoids, three pentagons, and the hexagon at the top." Furthermore, "Above each core pentagon is half an icosidodecahedron (3.5.3.5)."
To bead it, I used an edge-and-cover weave with 3 mm bugle beads for the edge beads and size 11° seed beads for the cover beads. (There's one exception, where I used 11° seed beads for the short edge beads under the squares.) In other words, every n-gon has 2n beads, including n edge beads alternated with n cover beads, all sewn in a loop.
Here you can see how I started to weave the inside layer, showing the edge-and-cover weave for (3.4.5.4), also known as the
rhombicosadodecahedron as I mentioned above.
This is a photo from
Ivona Suchmannova of Spiral Beading, showing the first layer curled into a ball.
This is the complete first layer of Crater Moon with 6 mm bugle beads and 11º seed beads. This piece will finish a lot larger than the others because the bugle beads are longer.
Here is the start of the second layer on Ivona's bead. She stitched loops of triangles around the pentagons, connected by at the bugle beads.
This
shows the start of layer 2 with the longer, 6 mm bugles. You can see the 5 triangles around the
pentagons and the 3 trapezoids around the triangles. The short edge of the
trapezoids is the aqua 8°. All other beads are 11° and 6 mm.
Next, the center front is still just one layer,
but layer 2 is nearly complete. Layer 2
consists of 30 little 3D pentahedrons sitting
on top of the squares in the first layer. Four
little walls like a camping tent, the four other
sides of the pentahedrons include two
triangles and two trapezoids. The short sides
of the trapezoids are the one place where
we use an 11° instead of a bugle bead.

These show the second layer finished. The seed beads in the center of the Xs (aqua below, burgundy above) are the tops of the tents, the one place I used seed beads for edge beads.
This is the start of the third layer. It's triangles and pentagons. Here are the pentagons.
And here you can see both pentagons and triangles.
You can add the pentagons and triangle in two steps, or you can stitch them together.
Here you see 3 of the 12 rings done.
Four more to go!
Here all 12 are done.
In the fourth layer, I finished the space under the 30 squares, adding two trapezoid loops per square.

The fifth and final layer requires adding 720 size 15° seed beads to the outer surface. Only then does the Crater Moon really hold its shape neatly.
You should make one.
It's just 11°, 15°, Toho 3 mm bugles, and Fireline 6lb.
And a whole lot of stitches.
Here you can see how big it is, just 1.75 inches across or 45 mm.
If you would like to have your very own Crater Moon, you can find the white one in my Etsy shop here:
https://www.etsy.com/listing/579082293/
The larger Crater Moon is available here:
https://www.etsy.com/listing/582628369/
Thanks for looking.
P.S. If you'd like to try weaving beads, but you think that the Crater Moon is a little beyond your skill set, have a look in my Etsy shop for tons of other
tutorials for all skill levels.
 This tutorial includes detailed
instructions for making the Floret Earrings and the matching necklace
with of tiny pendants with matching beaded beads. Everything uses
Japanese seed beads in two different sizes with the addition of other
small round, roundel and/or bicone beads. They are a wonderful way to small amounts of leftover seed beads and other small one-hole
beads.
This tutorial includes detailed
instructions for making the Floret Earrings and the matching necklace
with of tiny pendants with matching beaded beads. Everything uses
Japanese seed beads in two different sizes with the addition of other
small round, roundel and/or bicone beads. They are a wonderful way to small amounts of leftover seed beads and other small one-hole
beads. Each floret is 11/16 inch wide (12 mm) and almost an inch
tall (23 mm). They’re small and light, making them comfortable to wear
as earrings.
Each floret is 11/16 inch wide (12 mm) and almost an inch
tall (23 mm). They’re small and light, making them comfortable to wear
as earrings. The tutorial is detailed including 15 colorful
pages, with 110 full color illustrations and photographs. The tutorial
gives detailed illustrations, photographs, and written instructions to
make the Floret Earrings and matching necklace.
The tutorial is detailed including 15 colorful
pages, with 110 full color illustrations and photographs. The tutorial
gives detailed illustrations, photographs, and written instructions to
make the Floret Earrings and matching necklace. Thanks for looking!