Showing posts with label prism. Show all posts

Saturday, December 16, 2017

Floret Earrings and Charms with Modified Prismatic Right Angle Weave PRAW

Learn to make Floret Earrings and Necklace with this original variation on Modified Prismatic Right Angle Weave (MPRAW). This version of MPRAW is like Modified RAW described in Contemporary Geometric Beadwork, and other beading patterns. This tutorial is written for intermediate beaders who want to learn more about right angle weave (RAW). Knowledge of cubic RAW or modified RAW is recommended.
This tutorial includes detailed instructions for making the Floret Earrings and the matching necklace with of tiny pendants with matching beaded beads. Everything uses Japanese seed beads in two different sizes with the addition of other small round, roundel and/or bicone beads. They are a wonderful way to small amounts of leftover seed beads and other small one-hole beads.
Each floret is 11/16 inch wide (12 mm) and almost an inch tall (23 mm). They’re small and light, making them comfortable to wear as earrings.
The tutorial is detailed including 15 colorful pages, with 110 full color illustrations and photographs. The tutorial gives detailed illustrations, photographs, and written instructions to make the Floret Earrings and matching necklace.
 Thanks for looking!

Thursday, July 6, 2017

Prismatic RAW Pendant with Etched Seed Beads

I'm absolutely obsessed with the new etched seed beads.  I can't stop looking at them, which is good, because it makes me want to bead things. Like my previous post, this piece is stitched with prismatic right angle weave and square stitch.  I also added picots so I could see the etched beads "end up" which, as you can see, is where most of their color is. When you hold this in the sunlight, those little ends shimmer with orange fire.
When I weave beads, I typically think about how I would explain what I'm doing, so that I can eventually write up a tutorial.  Unfortunately, that kind of thinking can really hold me back creatively because I don't want to try things that are too hard to document. The frustrating part is that I haven't beaded anything I like very much lately, at least not any new designs.  So, in the last pendant and this one, I've been slowly letting go of the idea of documenting my process. Instead, I'm just enjoying making and watching the design emerge in my hands. It's liberating, and even exhilarating, but it also makes a piece like this difficult to reproduce exactly. 

Thanks for looking.

Monday, June 26, 2017

Atomic Beaded Pendant

It's been a long time since I beaded a new design I like.  I hope you like it too. The technique here is primarily prismatic right angle weave (PRAW) with square stitch.
The mat beads are the new etched  beads that have been recently released on Planet Bead, and I absolutely love them! I want them all! You can't tell from the photos, but they shimmer and twinkle and throw off tiny flashes of aqua and purple. I'm having fantasies of selling off three quarters of my bead collection and stocking up on etched seed beads in every color. But in the mean time, I was able to squeeze a few new tubes into my bead box.  

Thanks for looking.

Saturday, June 10, 2017

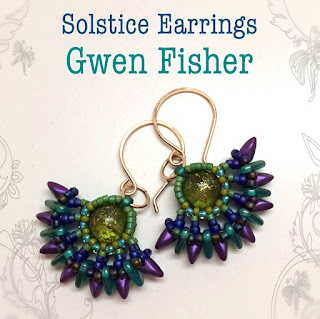
Victory Pod and Solstice Earrings


If you've been reading my blog for any amount of time, you already know that I like earrings.  Here are my two newest pairs.  First, these are Victory Pods to go with my new shirt.
https://www.etsy.com/listing/258021406/

Second are a pair of Solstice Earrings in an analogous color scheme that goes from purple to blue, aqua, green and gold. That's more than half the rainbow. These colors make me happy.
https://www.etsy.com/listing/480438911/

Thanks for looking.

Wednesday, December 7, 2016

Beading Tutorial - Pentadome Pendant

Learn to bead a Pentadome Pendant with Japanese seed beads and 2-hole beads.
https://www.etsy.com/listing/496880929/
 The two layers of beaded star weave create a stiff dome structure that holds it shape.

https://www.etsy.com/listing/496880929/
This tutorial includes step-by-step instructions for weaving a beaded pendant. 
https://www.etsy.com/listing/496880929/
Using an unusual and complex angle weave, the Pentadome is suitable for intermediate bead weavers who are already very comfortable with right angle weave. If you like RAW and want a new challenge, you’ll love this.

https://www.etsy.com/listing/496880929/
Pendant measure about 2 inches (5 cm) wide and 7/8 inches (22 mm) thick.
https://www.etsy.com/listing/496880929/
 Thanks for looking.  Happy holidays!

Wednesday, February 24, 2016

New Tutorial - Ginkgo Leaf Earrings Beaded with a Variation of Cubic Right Angle Weave


Ginkgo Leaf RAW Earrings
With nothing more than seed beads and thread, make these Gingko Leaf Earrings with this original variation on Cubic Right Angle Weave (CRAW). This tutorial is very detailed, written for advanced beginner beaders who have a basic knowledge of beading. Knowledge of CRAW is strongly recommended.

https://www.etsy.com/listing/269167493/
Each leaf is nearly inch wide (23 mm) and 20 mm tall. They’re small, and CRAW creates a lot of negative space. So they’re light, making them comfortable to wear as earrings.
https://www.etsy.com/listing/269167493/
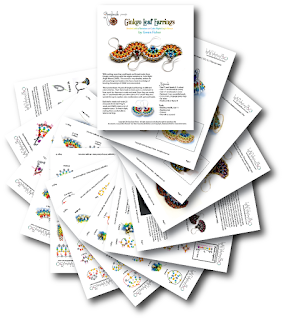
The tutorial is 14 pages, with over 90 full color illustrations and photographs, a COLORFUL FEAST for the eyes. The tutorial gives highly detailed illustrations, photographs, and written instructions to make the earrings. Included are 14 different pairs of Gingko Leaf Earrings in different color schemes. That I have made so many pairs is a testament to how much fun these are to make and wear. Since they use mostly size 11° seed beads with just a few colors of 15° and 8° they are a wonderful way to explore color combinations with just seed beads.
https://www.etsy.com/listing/269167493/
I beaded Ginkgo Leaves from time to time for over three years before I figured out how to write it down on paper. In my blog, I said I'd be "insane" to write a tutorial for this design. This is actually because I didn't really understand how to do it. As I posted more and more pairs of these earrings on the internet, bead weavers wrote to me, asking me to write a tutorial. So, I kept making pairs and eventually, I drew some pictures, and my method became clearer to me. Months passed, and I made more pairs, and drew more drawings. Then I made more pairs and eventually I understood the method, and I was able to draw all of the steps in a way that makes sense. Then I took photos to match the drawings, and wrote it all up. This tutorial is the culmination of a long process to document these earrings so that other bead weavers can enjoy making them too. This tutorial is also super colorful. I used a rainbow pair for the step photos and illustrations in the hopes that you will enjoy looking at this the tutorial as much as making and wearing the earrings.
https://www.etsy.com/listing/269167493/

Wednesday, August 26, 2015

New Tutorial - Tila Buckyball Bead Beaded with Bugle and Seed Beads

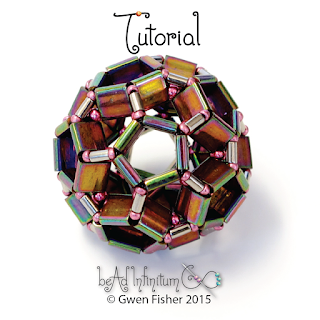
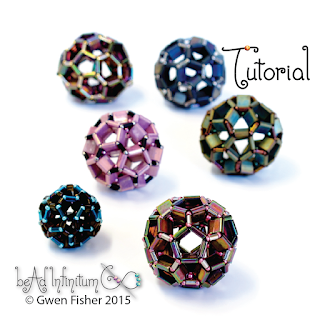
Here is a new tutorial that will show you how to weave beautifully spherical buckyballs with two-holed Tila beads (or half Tilas), bugles and seed beads.
beaded buckyball

The design is based upon the structure of a soccer ball. When made with shiny metallic beads, it has lots of facets that reflect light like a disco ball. The beaded bead is remarkably hollow with lots of large holes that let you see inside.
beaded buckyball

This tutorial is suitable for intermediate bead weavers who know have already beaded a dodecahedron of some sort. This beaded bead is a relatively quick project that will push your spatial reasoning thinking to new places.
beaded buckyball
Presented is a very efficient and intuitive method for beading the beaded beads and earrings, both in two sizes. Yes, that's right, you can make matching earrings in two sizes, and they weave up rather quickly!
pentagon earrings
 Thanks for looking!

Thursday, July 16, 2015

New Tutorial - Victorian Parlour Earrings Beaded with PRAW

  Victorian Parlour Earrings
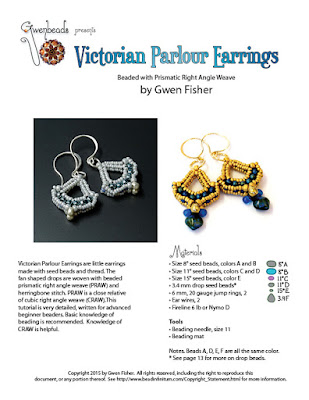
Victorian Parlour Earrings are little earrings made with seed beads and thread. The fan shaped drops are woven with beaded prismatic right angle weave (PRAW) and herringbone stitch. PRAW is a close relative of cubic right angle weave (CRAW). This tutorial is very detailed, written for advanced beginner beaders. Basic knowledge of beading is recommended. Knowledge of CRAW is helpful.
  Victorian Parlour Earrings
This tutorial includes an illustrated discussion of Prismatic Right Angle Weave and how it relates to CRAW. I provide detailed instructions for how to bead PRAW for this design. In the process, you can learn how to read charts like the like those found on my blog at http://gwenbeads.blogspot.com/2014/04/notation-for-cubic-right-angle-weave.html
  Victorian Parlour Earrings
Materials lists and photo galleries are included for all 5 pairs of earrings shown.
  Victorian Parlour Earrings
The tutorial is 14 pages, including about 100 illustrations and photographs. 
  Victorian Parlour Earrings
The tutorial is a PDF file that gives photos, illustrations, and charts to make the beaded earrings shown. If you would like to have a pair of these earrings without actually making them, check out the Earrings Section in my Etsy shop.  I put a few of these pairs in there today.
  Victorian Parlour Earrings
 Thanks for looking!
 Victorian Parlour Earrings

Wednesday, April 15, 2015

Coxeter Beaded Bead in Aqua

Here's the latest piece of my bead mat, a Coxeter Bead. It's a little over an inch wide, quite hollow, and it has big holes for stringing it on cord. The symmetry of this piece makes me think of a virus.
The dominant color is the aqua bugles, and then I added matte blue half tila beads to soften the bright aqua.  The tiny drop beads inside the circles came from a mixed box of beads, and I separated the colors when I wove them into the beaded bead. 
If you'd like to learn to make your own, you're in luck because I wrote a tutorial that explains how to weave a Coxeter Bead.  Thanks for looking!

Wednesday, October 29, 2014

Let me call you Sweetheart

I'm in love with you. 
Let me hear you whisper that you love me too. 
Sweetheart Pendant with Cubic Right Angle Weave

I couldn't decide which color of pink crystals to use.  So I used all of them.  I wrote a tutorial for the Sweetheart Pendant so you can learn to bead one yourself.  Thanks for looking.

Thursday, September 18, 2014

New Tutorial -- Coxeter Bead

 This is my newest beaded bead tutorial, the Coxeter Bead
Coxeter Beads are named after the great mathematician Harold Scott MacDonald Coxeter in honor of his extensive work on symmetry, especially four dimensional polytopes, on which this piece is based.
You weave it like cubic right angle weave, but with tetrahedrons and prisms instead of cubes. This tutorial is designed for experienced beaders, and it includes charts like those found on my blog here. This tutorial assumes you already how to do cubic right angle weave and know how to connect two ends to make a continuous strip. If you don’t, check out this link at my blog to learn how. You should also probably already know how to bead a dodecahedron or at least know what a dodecahedron is before trying this design. This is a dodecahedron.

This is a spinning dodecahedron.

If you want to learn how to bead a dodecahedron, Cindy Holsclaw wrote a free tutorial.  

With most of the same materials, you can make Coxeter Beads in two sizes (26 mm and 20 mm).
This is the main design, the larger version that I used in the step photos.  It uses 3 mm Toho beads and half Tila beads, tiny drop seed beads and some size 15° seed beads.
And this is the smaller version that I describe at the end of the pattern with some extra drawings and photos.
As a beaded bead, six large holes run through the center of a Coxeter Bead.  So you can easily string it on chain or cord.

Although it might sound complicated from that introduction, the structure of this thing is actually quite elegant. Once you get the hang of it, it's quite intuitive, and my tutorial is designed to give you that intuition. Click on the photo below to see the materials list. 
The tutorial is 14 pages, including over 100 illustrations and photographs. The tutorial is a PDF file that gives charts and explanations for reading the charts to make Coxeter Beads in two sizes.
https://www.etsy.com/listing/202740541/
Thanks for looking!

Monday, May 5, 2014

Hyperbolic Surface Tilings Woven with Beads and Thread

I've been beading hyperbolic tilings all week, and I can't stop!
I've seen lots of people crochet hyperbolic surfaces, most notably at the Institute for Figuring.  The typically technique is to crochet around and around the edge adding lots of extra increases in every round to make the edges ruffle.  Beaders sometimes do the analogous thing, making ruffled bracelets and necklaces that incorporate increases on each round.  But for these beaded pieces, I'm doing something a bit different.  I use hyperbolic tilings, also called tessellations.

Flat Bead Weaving

But before I go on, I want you to understand what I'm doing, so I'm going to digress a bit.  Consider flat bead weaving, like you might use to make a bracelet.  For example, you might bead a flat bracelet by using a tiling of squares.  With bead weaving, you can place one bead on each edge of a square tiling, and you get right angle weave (RAW).  This picture shows a few different flat bead weaves and the tilings used to generate them.
The bottom illustration in the picture above suggests that you could use the square tiling to make a different weave from RAW.  In particular, you could weave four beads in a loop for each square, and then add one extra bead on the edges to connect the loops.  That describes super right angle weave, or SRAW.  (I call that an across-edge angle weave.)  If you've ever done RAW or SRAW, you know that four loops at each corner make the beadwork lie flat.

Round Bead Weaving

If you use loops of four beads with three loops around each corner you end up with a beaded cube (generally called cubic right angle weave or CRAW).  If you start with SRAW and weave three loops around each corner you get a the photo below (which I named cubic super right angle weave or CSRAW).  You can think of this as the across-edge weave of a cube.  (It's also an edge-only beaded truncated octahedron, but that's not important right now.)
Sorry, that was a lot of jargon I just threw at you.  Forgive me.  What's important here is that you have flat weaves that can go on forever like a plane (e.g., RAW and SRAW), and you have round beaded beads that close up on themselves (like a single unit of CRAW and CSRAW).  Mathematically, if flat curvature is zero, and beaded beads like round spheres have positive curvature, then it reasons to question: What beadwork has negative curvature?  Hyperbolic surfaces have negative curvature.  Intuitively, you can think of negative curvature as ruffles.  Mathematically speaking, ruffles are the opposite of spheres.  And flat sheets are in the middle.

Hyperbolic Surfaces

Hyperbolic surfaces are really interesting.  In fact, they have their very own hyperbolic geometry, quite different from the Euclidean geometry you probably learned in high school.  For one thing, in hyperbolic geometry, the parallel postulate is false. But what's most interesting to me, as an artist, is that there are lots of different ways to represent hyperbolic surfaces.  For example, this circle uses the Poincare disc model of hyperbolic space.
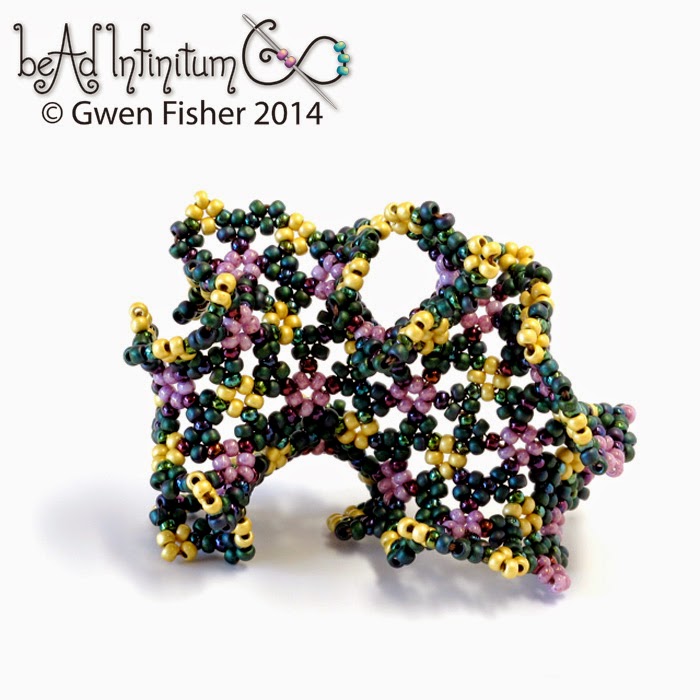
The square tiles are colored in pink, purple, blue, green and yellow.  That's right; those are squares (or maybe they're rhombuses).  I know they don't look like the regular squares you're used to, but that's just the Poincare model doing its thing.  Imagine that those four sided things are squares, and every black side is straight and the same length.  If you make this with bead weaving, you can make all the edges the same length.  For example, you could put one bead on every edge and weave a loop of 4 beads for each tile (an edge-only weave of the drawing).   I didn't do that.  Instead, I used an across-edge weave, something akin to SRAW.
In particular,  I weaved loops of four beads of the same color for each square (rhombus), and then attached the loops by one bronze bead on the edges.  Notice I used five colors just like the illustration above. The bronze beads are on the edges with the holes are perpendicular to the edges.  Here's another view of the same piece. 

And here you can see how big it is.  This little guy is looking for a new home if you'd like to adopt him: https://www.etsy.com/listing/188233621/

I used to think that a beaded hyperbolic surface looks like just a ruffled mess of beads.  I beaded a few in 2012, and I went to great length to try to bound them into symmetric submission by adding bigger beads into the folds.  Like this:
I showed this piece to Vi Hart, and she encouraged me to bead a different tiling without the extra big beads holding them in place.  That's why I beaded the...

Snub Tetrapentagonal Tiling

Ah, the beautiful snub tetrapentagonal tiling.  No, I didn't name it.  That's what everybody calls it.
Here is my beaded version.  I used pink beads for the pentagons, green beads for the triangles and yellow beads for the squares. Relatively speaking, this piece is flat-ish.  What I mean is it has less negative curvature than tiling one above.  I had to add a lot more beads before it started to ruffle.
Hyberbolic Surface Tiling
Vi likes this tiling because it's chiral, which makes it unusual.  See the little pinwheels in the holes below?  If you look at the other side, you'll see the mirror reflection with the pinwheels spiraling in the opposite direction.
Hyperbolic surface tiling
Then, I beaded the...

Rhombitetrahexagonal Tiling 

which I first noticed in John Conway's book, "The Symmetry of Things."  But I got this drawing from Wikipedea because it's in the public domain, and Conway's book isn't.
This is called the rhombitetrahexagonal tiling.  I didn't name this one either.  Notice the blue and green checkered stripes.  I like those stripes.  I wanted to emphasize those stripes in my piece, so I made the blue and green squares the same color.  They're all green in my beaded version below.  Maybe it's just me, but it seems a little peculiar to have a ruffled thing with stripes.  I guess you could make a ruffled skirt out of striped fabric, and then have striped ruffles.  Anyway, here it is. 
In my beaded version, I made the hexagons pink, and the squares green and purple.  The edges are a few different colors depending on which tiles they touch. Here you can see how big it is.  It's for sale so you can enjoy it in the comfort of your own home.
It's got a lot of personality, this little fellow. Now notice that this tiling has three squares and one hexagon around every vertex.  It's probably easiest to see that in the red, blue, yellow drawing above.
Let me say that again: three squares and one hexagon around every vertex.  So does this piece of beaded Faujasite have three squares and one hexagon around every vertex.  You have to be careful where you look to see that because some places appear to have two hexagons and a square.  Those are places where I stopped adding beads.  If I kept going and made this piece infinitely large in every direction, they'd finish with three squares and a hexagon just like the rhombitetrahexagonal tiling above.  (I'm going to need more beads for that.)  So, this piece below is a different representation of the same hyperbolic tiling right above.  Wacky. 
There are some fascinating artistic implicatons to that last thing I said.   So stay tuned, 'cause I'm playing around with that idea.  And if you actually made it this far, thanks.  You're awesome.
Related Posts Plugin for WordPress, Blogger...