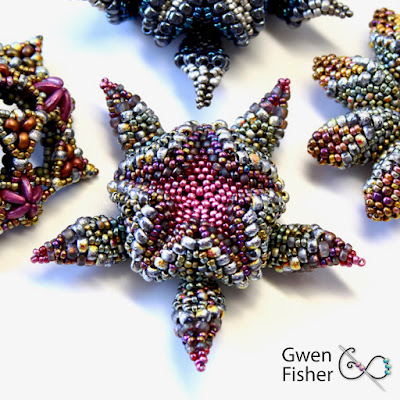
Showing posts with label star. Show all posts

Friday, March 22, 2019

Star Cluster beaded bead in pink blue olive

Last night my friend Melanie helped me choose colors for this Star Cluster beaded bead. We tried to find a new combination of colors that I haven’t tried before. We started with Pantone’s Live Coral, but ended up with rosy pink, to which we added dark grayish blue and light olive. The olive beads actually flicker in pink. It contains over 450 beads and measures just over an inch from point to point.
Find this piece here: https://www.etsy.com/listing/675222630/star-cluster-beaded-bead-in-pink-blue

Learn to make your own with my tutorial on Cluster Beaded Beads.

Here is a photo of my dog.  He likes belly rubs.

Thursday, May 17, 2018

Something Old Is New Again

 https://www.etsy.com/listing/599661326/
When I opened up the file to update it, I saw why I haven't been selling the tutorial for the Seven Sisters Pendant in quite a while. This was one of my earliest bead weaving designs, and I wrote the tutorial before I figured out how to write a tutorial very well. The only thing that was salvageable was the illustrations and some of the photos. I rewrote pretty much all of the text and shot a whole new sequence of step photos. Plus, I added lots of tips so that your pendant will turn out pretty, and increased the gallery with new photos of beadwork.
 https://www.etsy.com/listing/599661326/

y section. Anyway, here's a link to the new, and much improved version of the tutorial.

Monday, March 5, 2018

Friday, September 15, 2017

Cellini Asterisk Pendant in Czech Etched Seed Beads

https://www.etsy.com/listing/544545878/cellini-asterisk-pendant-in-etched
This Cellini Asterisk is a beaded pendant, woven from hundreds of glass seed beads in the colors silver, burgundy, and metallic pink. Many of the beads are the new Czech etched beads that shimmer and twinkle in the light. This ornate cluster is composed somewhere between 1200 and 1500 beads, too many to count. The beadwork is hollow, making it light for its size.
https://www.etsy.com/listing/544545878/cellini-asterisk-pendant-in-etched
This pendant is 6 cm (2 and 3/8 inches) from point to point and 16 mm thick, suitable for a focal bead on a necklace. The hole is the center is 7 mm wide. It looks a bit like a five-legged spider from the back side.
https://www.etsy.com/listing/544545878/cellini-asterisk-pendant-in-etched
If you would like to learn how to make your own Cellini Asterisk, I have a tutorial available here: https://www.etsy.com/listing/261775731/tutorial-cellini-asterisk-pendant-beaded.
https://www.etsy.com/listing/544545878/cellini-asterisk-pendant-in-etched

Thanks for looking.

Saturday, August 26, 2017

Cellini Flower made with peyote stitch

Here is the newest piece off of my beading needles, a Cellini Flower made with several different metallic seed beads including the new Czech etched ones that shimmer and twinkle in the light. If you haven't tried the new etched beads, I really recommend them.  I have them in a few colors, and I'm totally in love.

Find this flower here: https://www.etsy.com/listing/552902817/
Find the tutorial here: https://www.etsy.com/listing/255173329/

Wednesday, December 7, 2016

Beading Tutorial - Pentadome Pendant

Learn to bead a Pentadome Pendant with Japanese seed beads and 2-hole beads.
https://www.etsy.com/listing/496880929/
 The two layers of beaded star weave create a stiff dome structure that holds it shape.

https://www.etsy.com/listing/496880929/
This tutorial includes step-by-step instructions for weaving a beaded pendant. 
https://www.etsy.com/listing/496880929/
Using an unusual and complex angle weave, the Pentadome is suitable for intermediate bead weavers who are already very comfortable with right angle weave. If you like RAW and want a new challenge, you’ll love this.

https://www.etsy.com/listing/496880929/
Pendant measure about 2 inches (5 cm) wide and 7/8 inches (22 mm) thick.
https://www.etsy.com/listing/496880929/
 Thanks for looking.  Happy holidays!

Friday, October 7, 2016

New Tutorial - Solstice Earrings

You can learn to make Solstice Earrings with this original variation on Cubic Right Angle Weave (CRAW). This tutorial is very detailed, written for advanced beginner beaders who have a basic knowledge of bead weaving. Knowledge of CRAW is recommended but not assumed.
Solstice Earrings use two types of fancy beads, combined with our old favorites of seed beads and rounds. The fancies include little drops or daggers and little beads with two holes. This purple pair below is available here: Purple Solstice Earrings.
Several pages show and describe 6 pairs of earrings using different types of fancy beads, including all of these.
Depending on which bead shapes you use, each Solstice Earring is usually a little over an inch wide (28-30 mm) and 20-22 mm tall. You can also make large earrings (48 mm wide) like this pair with long dagger beads, which are for sale here: Neon Pink Solstice Earrings.

The tutorial is 15 pages, with over 90 full color illustrations and photographs, a COLORFUL FEAST for the eyes. The tutorial gives highly detailed illustrations, photographs, and written instructions to make six different pairs of earrings. That I have made so many pairs of Solstice Earrings is a testament to how much fun these are to make and wear. This is my King Tut pair in lapis blue and gold.
Thanks for looking.  Have a great weekend.

Monday, January 11, 2016

New Tutorial - Cellini Asterisk Pendants

Make these starfish pendants in 2 sizes with this original variation on beaded Cellini spiral, using peyote and herringbone stitches and seed beads.
Alien flower pods or star fish? The center of these pendants is an urchin-like hollow puff of seed beads, with five pointy legs growing out of the base. The beadwork is stitched with just 3 sizes of regular Japanese seed beads. No fancy shapes required! So if you are a bead weaver, you probably already have everything you need.

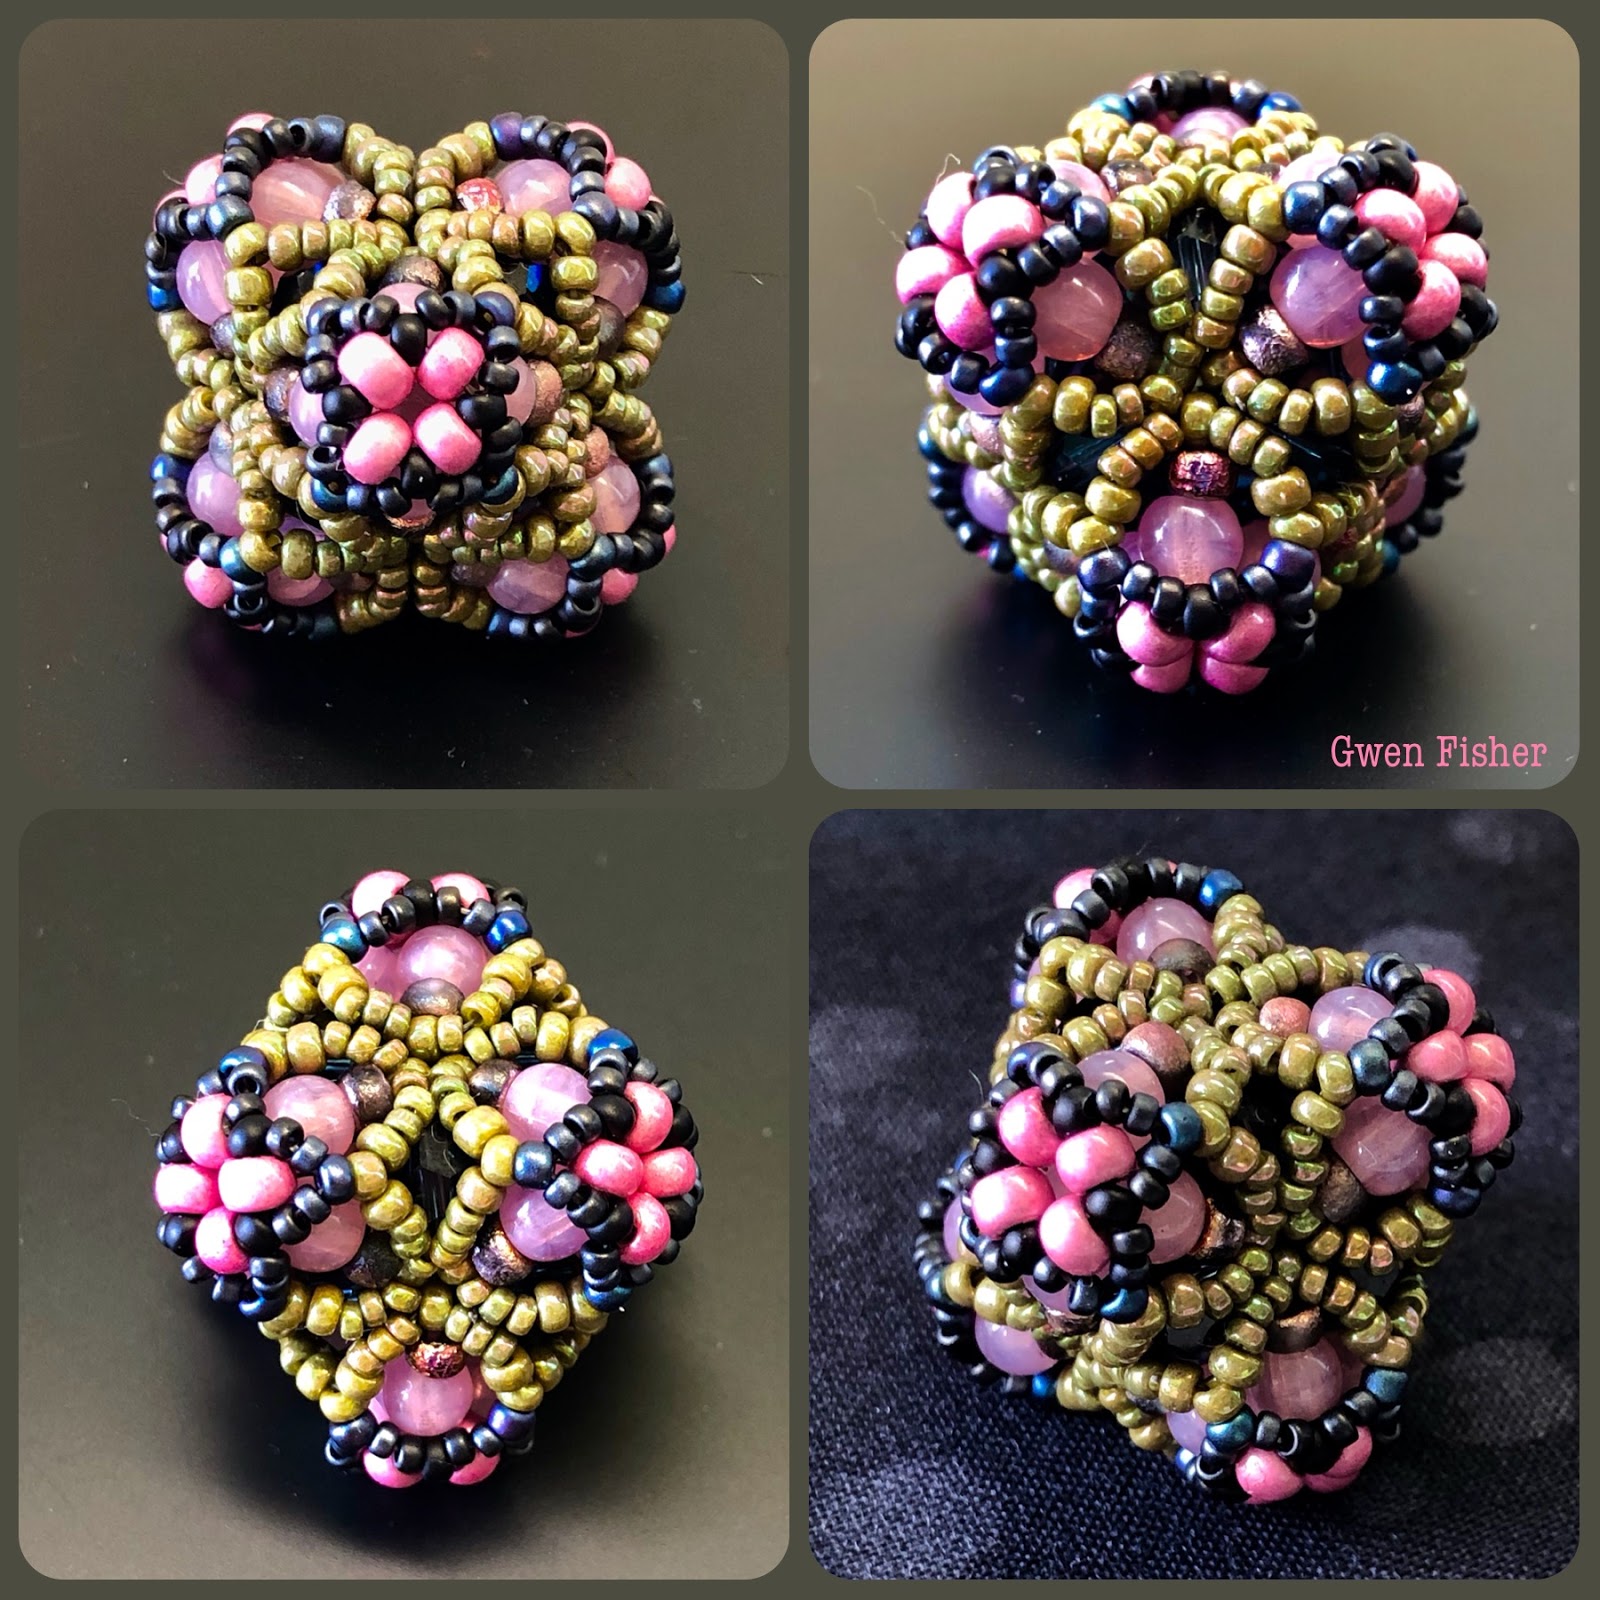
This project is suitable for intermediate bead weavers who like peyote stitch. If you like the Victory Pod Earrings, you'll love making the matching Cellini Asterisk Pendant.
https://www.etsy.com/listing/258021406/
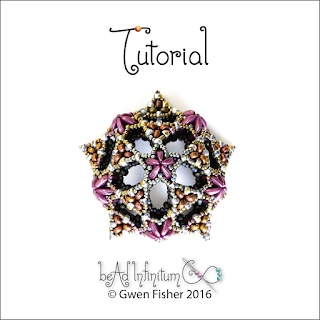
This tutorial shows three versions of the large Cellini Asterisk Pendant. The large ones measure 6 cm (2 and 3/8 in) point to point by 17 mm (less than 3/4 inch) thick. I made the easier version first, and although I like it, it is a bit squishy and, its legs are a bit wiggly. For the second version, I set out to make it stiffer, and so it is. The legs are also a wee bit fatter.
All of the adjustments are explained in the instructions. The stiffer large pendant is used in the step photos and illustrations. After you learn to make the units and assemble them, there is one page on stitching a bail, and another page on how to make the easier version of the pendant and how it differs from the harder version. There is also one page on the small pendant, including a few key illustrations and comments to get you started, and then a bunch of step photos showing how to assemble the pieces, including the bail.
You can also make these pendants with 2, 3 or 4 points instead of 5. So if you want to make a whole alien garden, you'll have lots of different flowers to put into it.
The tutorial is 15 pages, with 100 full color illustrations and photographs, a colorful feast for the eyes. The tutorial gives highly detailed illustrations, photographs, and written instructions to make Cellini Asterisk Pendants with seed beads and thread.
Thanks for looking.

Wednesday, September 3, 2014

New Tutorial -- Mini Crown Earrings

Mini Crown Earrings: Beaded with right angle weave, these seed bead earrings are small, light, and super cute!
https://www.etsy.com/listing/202127734/
As you can see, these earrings are very small.
https://www.etsy.com/listing/202127734/
Tutorial now available. https://www.etsy.com/listing/202127734/
Here you can see all 13 pages.

https://www.etsy.com/listing/202127734/
 You can use almost all seed beads, but in this pair I added bicone crystals.
https://www.etsy.com/listing/202127734/
 And in this pair, I used tiny Swarovski pearls surrounding red siam round crystals.
https://www.etsy.com/listing/202127734/

These little crowns are made with Modified Right Angle Weave (MRAW). Each earring has lots of detail and intricacy in a tiny component. It's a design I came up with in 2010, and it has taken me this long to finally complete the pattern. I hope you find it worth the wait. 

Friday, May 17, 2013

Starburst Galaxy Fire Necklace

I recently showed you the Starburst Galaxy Kit in the Fire colorway in blazing orange, hot pink and purple Swarovski crystals!  I linked them together into a necklace and added some more Swarovski crystal briolette drop beads to dangle from the links.
Here you can see how it looks on.  It's not symmetrical, but I think it's still well balanced.  I like the stars placed asymmetrically because real stars in the sky are scattered randomly.  So I think that's how they're supposed to look, scattered and random.  Plus, the stars themselves are so symmetric, it's nice to break it up a bit and add some randomness back into the finished piece. 
If you'd like to join us for the class, you can't because it's over.  But we do have patterns and kits now available: Beaded Starburst Galaxy.

Saturday, May 4, 2013

Starburst Galaxy Kit in Fire

I recently showed you the Starburst Galaxy kit in the Water colorway.  Here are some of the stars in the Fire colorway in blazing orange, hot pink and purple Swarovski crystals!
 Here you can see how the kit might look as a necklace and a pair of earrings.
 Or one large necklace...
 Or a wall hanging...
Or a bracelet...
There are so many ways to arrange these stars.  If you would like to learn to make beaded stars for yourself, we have patterns and kits available.

Tuesday, April 2, 2013

Starburst Necklace (Water) Part 3

I finished my Starburst Galaxy necklace in this color scheme inspired by water. 

In the Starburst Galaxy class students will learn to make a whole galaxy of beaded stars.  I wanted students to make a nice sample of the different sizes, so the kits we are assembling will make the 5 different stars shown here.   (These 5 stars are just a few of the 20 or more possibilities you can make with this technique.)    The kits include enough materials to make 9 different stars:  1 large 8-star and 2 each of the smaller stars.   With 9 stars, you can make earrings, pendants, a bracelet or a necklace, or some combination of these.  We thought it would be the most fun and informative for you if the kits make a bunch of different stars, and then let to you decide how to finish your stars into jewelry.  I finished mine into a necklace with some twisted cubic right angle weave in the back.

I'm going to make two more beaded star kits for this class.  For the "Fire" and "Gothic" Starburst kits, we just ordered a HUGE pile of Swarovski crystals yesterday morning.  Once the crystals arrive, I'll start beading some sample, and show you photos as I take them.  Thanks for looking.

Tuesday, March 26, 2013

Starburst Necklace (Water), Part 2

I'm still working on my Starburst Galaxy necklace kit in this color scheme inspired by water. 
I think I finished all of the stars I'm going to use in this piece. I wanted to make a nice sample of the different sizes, so the kits I'm going to assemble for my students will make all of the stars shown here. Still, I'm going to leave it up to the individual students to find their own drop beads. I'm also going to let them decide how they want to finish the back, or if they want to make a bracelet or earrings or what.

...which brings me to my next task, figuring out how to finish the back of this necklace... with a beaded cable, maybe? A metal chain, ribbon, or stringing beads? Oh the possibilities!

Thanks for looking.

Monday, March 25, 2013

Desiging Starburst Galaxy Kits Water


I'm working on classroom kits for the Starburst Galaxy class that Florence Turnour and I will be teaching at the Bead & Button Show in June 2013.    The class will teach you to make stars in four different sizes, each with any numbers of points.  The five stars here are just a few of the 20 or more possibilities.

These stars are links, meaning that they are components that you can connect together with jump rings.  You can also dangle wired drops from their points.  After I finish weaving the rest of the set, I'll link them together to make a large necklace and show you. 

We now have patterns and kits available for the Beaded Starburst Galaxy so you can learn to make them yourself.

Friday, March 15, 2013

New Pattern: Lotus Drop Earrings

Here is my latest pattern, the Lotus Drop Earrings.  Here is the first pair, made with cubic right angle weave (CRAW).  I fell in love with the design, but I wasn't looking forward to writing another pattern with CRAW.    You can see the back is different from the front.
I also made this pair to illustrate how you can add wire wrapped drop beads that dangle from the bottom point.
See how small they are, a great size for earrings, I think. 
When I showed them to Florence, she liked them too, but I when I told her that I really didn't want to write another pattern with CRAW, she had the brilliant suggestion to redesign them to remove the CRAW.  Then she proceed to make me a prototype that gave nearly the same result, but with a different stitching pattern.  I tweaked them a bit more and made this pair.  Between the two of us, we came up with a design that's thinner than the others, and a bit lighter too.  It doesn't have any extra beads that don't need to be there, and it still has just enough thickness to give them some structure so they don't bend. They're rigid, little components.
Then I made this pair with real gemstones and gold plaited charlotte seed beads. With the improved design, they're not only easier to make, but the crystals in the windows don't have beads behind them.  So they really sparkle.
 
Aren't they pretty?  My mom really fell in love with this pair.  So if they don't sell before her birthday, I know what she's getting this year.

Here's the one kit I have made so far.  The pattern explains how to make both the large and small lotus drop components in these earrings.  
Here you can see how big they are, just the right size for long earrings, I think.  In fact, they're my new favorite earrings. They're not too heavy, and the links make them drape beautifully.  I feel like a movie star when I wear them! 
These little components are really fun to link together and hang things from.   If you want the earrings, click the photos.  If you want to learn how to make your own, my pattern is very detailed with 16 pages and 81 color illustrations and photographs, including 5 full pages of variations and inspirations.  Also, look out for my next blog post, and I'll show you some more complicated things you can do with Lotus Drops.  Thanks for looking.
Related Posts Plugin for WordPress, Blogger...