I've been
beading hyperbolic tilings all week, and I can't stop!
I've seen lots of people crochet hyperbolic surfaces, most notably at the
Institute for Figuring. The typically technique is to crochet around and around the edge adding lots of extra increases in every round to make the edges ruffle. Beaders sometimes do the analogous thing, making ruffled bracelets and necklaces that incorporate increases on each round. But for these beaded pieces, I'm doing something a bit different. I use hyperbolic tilings, also called tessellations.
Flat Bead Weaving
But before I go on, I want you to understand what I'm doing, so I'm going to digress a bit. Consider flat bead weaving, like you might use to make a bracelet. For example, you might bead a flat bracelet by using a tiling of squares. With bead weaving, you can place one bead on each edge of a square tiling, and you get right angle weave (RAW). This picture shows a few different
flat bead weaves and the tilings used to generate them.
The bottom illustration in the picture above suggests that you could use the square tiling to make a different weave from RAW. In particular, you could weave four beads in a loop for each square, and then add one extra bead on the edges to connect the loops. That describes
super right angle weave, or SRAW. (I call that an
across-edge angle weave.) If you've ever done RAW or SRAW, you know that four loops at each corner make the beadwork lie flat.
Round Bead Weaving
If you use loops of four beads with three loops around each corner you end up with a beaded cube (generally called
cubic right angle weave or CRAW). If you start with SRAW and weave three loops around each corner you get a the photo below (which I named
cubic super right angle weave or CSRAW). You can think of this as the across-edge weave of a cube. (It's also an edge-only beaded truncated octahedron, but that's not important right now.)
Sorry, that was a lot of jargon I just threw at you. Forgive me. What's important here is that you have flat weaves that can go on forever like a plane (e.g., RAW and SRAW), and you have round beaded beads that close up on themselves (like a single unit of CRAW and CSRAW). Mathematically, if flat curvature is zero, and beaded beads like round spheres have positive curvature, then it reasons to question: What beadwork has negative curvature? Hyperbolic surfaces have negative curvature. Intuitively, you can think of negative curvature as ruffles. Mathematically speaking, ruffles are the opposite of spheres. And flat sheets are in the middle.
Hyperbolic Surfaces
Hyperbolic surfaces are really interesting. In fact, they have their very own hyperbolic geometry, quite different from the Euclidean geometry you probably learned in high school. For one thing, in hyperbolic geometry, the parallel postulate is false. But what's most interesting to me, as an artist, is that there are lots of different ways to represent hyperbolic surfaces. For example, this circle uses the Poincare disc model of hyperbolic space.

The square tiles are colored in pink, purple, blue, green and yellow. That's right; those are squares (or maybe they're rhombuses). I know they don't look like the regular squares you're used to, but that's just the Poincare model doing its thing. Imagine that those four sided things are squares, and every black side is straight and the same length. If you make this with bead weaving, you can make all the edges the same length. For example, you could put one bead on every edge and weave a loop of 4 beads for each tile (an edge-only weave of the drawing). I didn't do that. Instead, I used an across-edge weave, something akin to SRAW.
In particular, I weaved loops of four beads of the same color for each square (rhombus), and then attached the loops by one bronze bead on the edges. Notice I used five colors just like the illustration above. The bronze beads are on the edges with the holes are perpendicular to the edges. Here's another view of the same piece.
And here you can see how big it is. This little guy is looking for a new home if you'd like to adopt him: https://www.etsy.com/listing/188233621/
I used to think that a beaded hyperbolic surface looks like
just a ruffled mess of beads. I beaded a few in 2012, and I went to great length to try
to bound them into symmetric submission by adding bigger beads into the folds. Like this:
I showed this piece to
Vi Hart, and she encouraged me to bead a different tiling without the extra big beads holding them in place. That's why I beaded the...
Snub Tetrapentagonal Tiling
Ah, the beautiful snub tetrapentagonal tiling. No, I didn't name it. That's what everybody calls it.
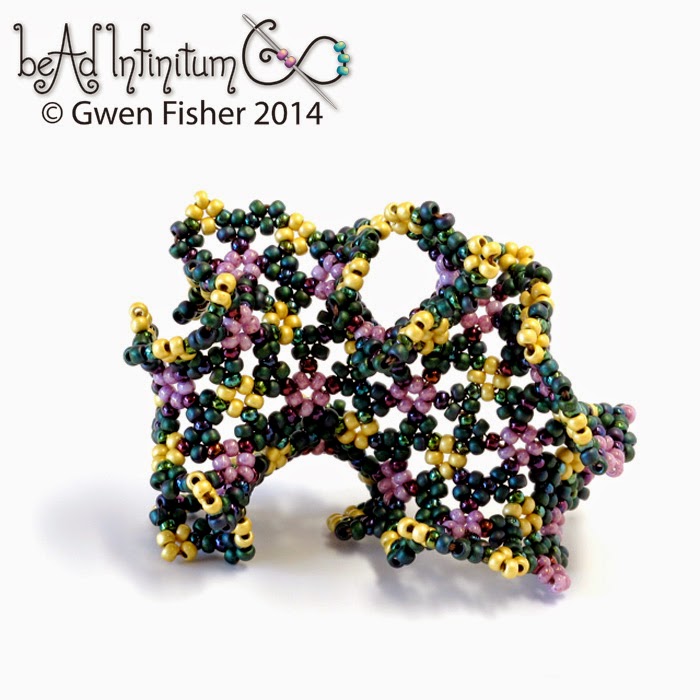
Here is my beaded version. I used pink beads for the pentagons, green beads for the triangles and yellow beads for the squares. Relatively speaking, this piece is flat-ish. What I mean is it has less negative curvature than tiling one above. I had to add a lot more beads before it started to ruffle.
Vi likes this tiling because it's chiral, which makes it unusual. See the little pinwheels in the holes below? If you look at the other side, you'll see the mirror reflection with the pinwheels spiraling in the opposite direction.
Then, I beaded the...
which I first noticed in John Conway's book, "The Symmetry of Things." But I got this drawing from Wikipedea because it's in the public domain, and Conway's book isn't.
This is called the rhombitetrahexagonal tiling. I didn't name this one either. Notice the blue and green checkered stripes.
I like those stripes. I wanted to emphasize those stripes in my piece, so I made the blue and green squares the same color. They're all green in my beaded version below. Maybe it's just me, but it seems a little peculiar to have a ruffled thing with stripes. I guess you could make a ruffled skirt out of striped fabric, and then have striped ruffles. Anyway, here it is.
In my beaded version, I made the hexagons pink, and the squares green and purple. The edges are a few different colors depending on which tiles they touch. Here you can see how big it is. It's for sale so you can enjoy it in the comfort of your own home.
It's got a lot of personality, this little fellow. Now notice that this tiling has three squares and one hexagon around every vertex. It's probably easiest to see that in the red, blue, yellow drawing above.
Let me say that again: three squares and one hexagon around every vertex. So does this piece of
beaded Faujasite have three squares and one hexagon around every vertex. You have to be careful where you look to see that because some places appear to have two hexagons and a square. Those are places where I stopped adding beads. If I kept going and made this piece infinitely large in every direction, they'd finish with three squares and a hexagon just like the
rhombitetrahexagonal tiling above. (I'm going to need more beads for that.) So, this piece below is a different representation of the same hyperbolic tiling right above. Wacky.
There are some fascinating artistic implicatons to that last thing I said. So stay tuned, 'cause I'm playing around with that idea. And if you actually made it this far, thanks. You're awesome.
 Although it might sound complicated from that introduction, the structure of this thing is actually quite elegant. Once you get the hang of it, it's quite intuitive, and my tutorial is designed to give you that intuition. It's beaded much like cubic right
angle weave but with tetrahedrons and prisms instead of cubes. This
tutorial is designed for experienced beaders, and it includes charts
like those found on my blog here.
This tutorial assumes you already how to do cubic right angle weave and
know how to connect two ends to make a continuous strip. If you don’t,
check out the links here to learn how.
Although it might sound complicated from that introduction, the structure of this thing is actually quite elegant. Once you get the hang of it, it's quite intuitive, and my tutorial is designed to give you that intuition. It's beaded much like cubic right
angle weave but with tetrahedrons and prisms instead of cubes. This
tutorial is designed for experienced beaders, and it includes charts
like those found on my blog here.
This tutorial assumes you already how to do cubic right angle weave and
know how to connect two ends to make a continuous strip. If you don’t,
check out the links here to learn how. You should
also probably already know how to bead a dodecahedron or at least know
what a dodecahedron is before trying this design. This is a dodecahedron.
You should
also probably already know how to bead a dodecahedron or at least know
what a dodecahedron is before trying this design. This is a dodecahedron. One of the things I like about this structure is that it has
large holes that run through its center so you can easily string it on chain
or cord.
One of the things I like about this structure is that it has
large holes that run through its center so you can easily string it on chain
or cord. Another thing I like about this beaded bead is that the underlying structure comes from something that is four dimensional. If you were to try to build the whole structure with bugle beads, it wouldn't work because the angles don't actually match up precisely. Even the little piece I beaded probably wouldn't work. It's close, but not exact. But because seed beads are short and bead weaves are flexible, you just have to be close. So bead weaving makes it possible to build a little chunk of this 4D thing in 3D, thereby making the impossible just unlikely. Thanks for looking.